Table Of Content
Whenever we upload something that has more than one layer, Cricut automatically groups them. So it’s a great idea to just un-group right away, because it makes it easier. Just get into the habit of ungrouping them, unless, you know, you’re following a tutorial that says, just go for it and click make it, ’cause I have lots of tutorials like that. But for this one, I want you to ungroup them because that allows us to operate and use these layers independently, which is important. All right, so this layer here, it’s all ready to go, so we’re just gonna put this down here out of our way.
Get access to my free library!
Now, right now, they’re two separate hearts. We can tell because when I click on them, the border is around that each one individually and over in the layers menu, I have one heart here and one heart here. And even though I’ve arranged them the way that I want, they will not cut out this way yet. We have to give our Cricut more instruction than this. So when we’re ready to make a project, we click on the green make it button here in the upper right-hand corner. So I’m gonna go ahead and click that.
HOW TO REMOVE MATERIAL FROM A MAT
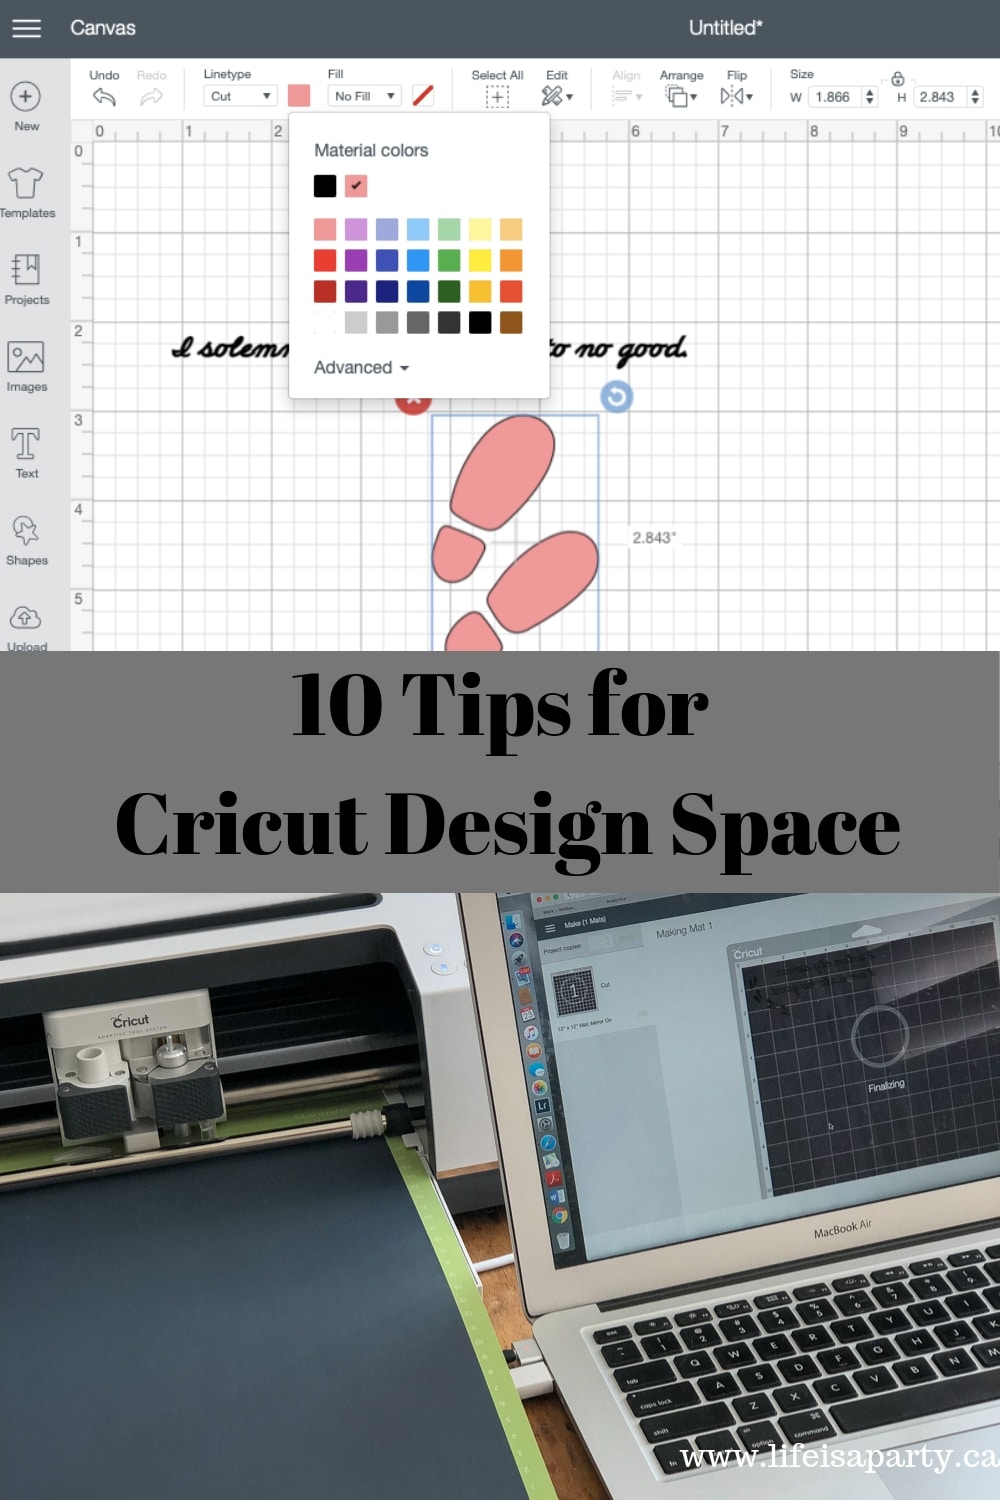
Canvas is where your projects are designed. Learn about all of the icons and tools around the Canvas. Learn to navigate Design Space and use tools to create one-of-kind projects! Select a link below for instructions, tips, and tricks.
Design Space: DIY with Cricut
We need the writing font, the writing style. I’m gonna select that and it’s gonna change, so it actually changes quite a bit. So this here is, and those Gs are just the way they are, it’s just the style of the font, it’s not a mistake. So this is still a little bit too big. Once you change the font, you’ll get changes like that happening, but that looks good.
Making quantum circuits more robust MIT News Massachusetts Institute of Technology - MIT News
Making quantum circuits more robust MIT News Massachusetts Institute of Technology.
Posted: Mon, 21 Mar 2022 07:00:00 GMT [source]
And then you type your name, whatever your name is I’m gonna make this one for Greg. So this is text and we are going to have our pen draw, write, this text onto our certificate, along with my signature there. So there’s a few issues right away, as you can tell. That’s not gonna fit on our certificate. Also, I don’t think the pen is gonna write that. We need, and also it’s like, not even like centered or anything.
If we click it, we get access to all of the fonts. Now, just like with the images, we can tell when a font is available for Cricut Access with the little green symbols that we see here. And when it’s not and it costs money, there’ll be a price at it. It says, oh, it’s a Disney font. So this font, if I wanted to use it, I’d have to pay for it.
PREPARE SCREEN
But, when I go to cut it, I’m still not going to get them overlapping. They’re still gonna be side to side. So group is something that we do to keep files together as we’re designing, but not something we do to keep files together all the time.
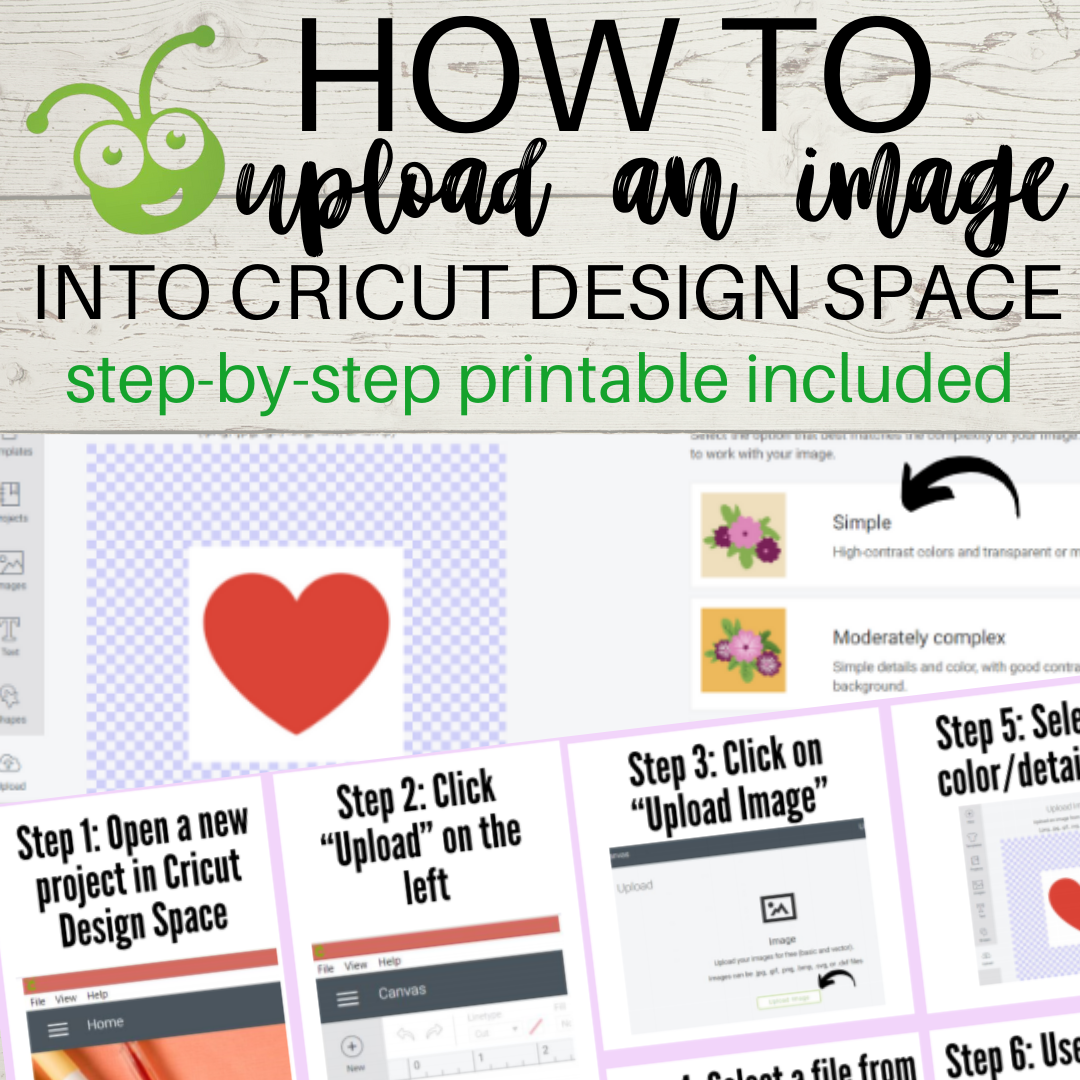
HOW TO UPLOAD A SVG CUT FILE TO CRICUT DESIGN SPACE
All everything that we want to draw is set to the draw and the layer that we want to cut, which is the yellow layer, is set to cut. All right, well, I think that we’re ready to go ahead and click make it and actually make this. So it stores everything you upload. Unless you tell it to delete, it keeps and that’s very useful.
SELECTING AN IMAGE
Cricut Joy has a simpler app you can also use, to help you create quick projects on the go. Find out more about the Cricut Joy app here. We demonstrate how to use the Offset function in Design Space to make projects, including a cake topper and sticker. This series of mini-lessons goes beyond surface level to show you how to work with images in Design Space like a seasoned expert.
So look at how beautiful and clean that cuts. When we go back to Design Space, it knows that we’ve finished and it takes us back to this page. Now, if you wanted cut another one, you certainly could from this page, but usually what you’ll wanna do now is click on finish and immediately go save it. So I’m gonna show you right now. So I’m in the upper left corner next to like your machine selection.
So let’s undo all the way until we no longer see that line and we’re back to our two layers. And I’m gonna select them both again by clicking and dragging around them. All right, our next choice is to weld. Now, if we weld, it will actually put them together permanently, which is what I’m looking for.
So there is our trophy and it says I did it. So you don’t need any glue or tape or anything, and it goes right into the little corners like this. There’s a little bit of paper there. And all four corners, just like that. And you have a cute little frame with your name on it and I signed it.


No comments:
Post a Comment